About Abbot J
Abbot J is a made-to-order custom Mercury Class Astrobot, named after Abbot’s Pass in Banff National Park in Alberta Canada. The ‘J’ is short for Jerry, a person of meaningful significance to Abbot J’s new family.
Abbot’s Pass is a important place to Abbot J’s caretaker. Here’s a picture of him with his son enjoying some fresh air. It doesn’t look much like tee-shirt weather to me, but the proof’s in the photo.
Incorporating a Family Heirloom into an Astrobot
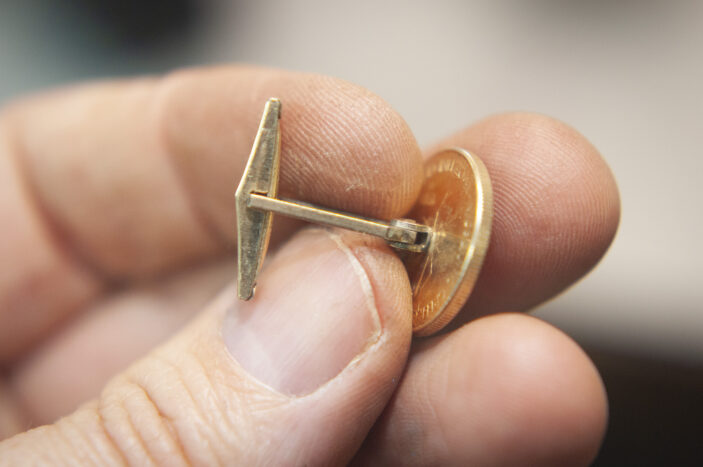
I was given the honor of creating a special robot that incorporated these cufflinks, made from two solid gold coins. Where should they be used in an Astrobot? My first thought was perhaps kneecaps, or elbows, or some kind of badges on the torso. Perhaps the eyes? All these choices seemed kind of silly. I thought epaulets would be a nice way to showcase the cufflinks, without them dominating the piece or looking out of place.
Could precious and irreplaceable gold objects be incorporated into this steel robot’s anatomy without being damaged? I’m much more of a welder than a machinist, but I did enjoy the unique challenge of incorporating precious metal into Abbot J. My solution was to use a castle nut and modify it to create an interface.
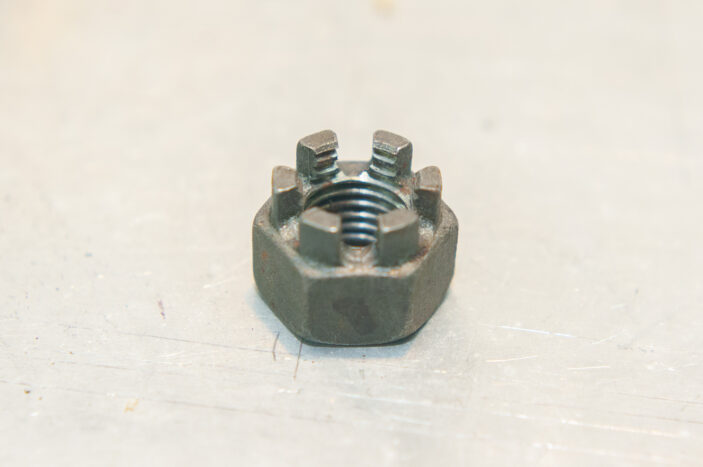
The castle nut is my all-time favorite kind of nut, with the acorn nut and the wingnut being close contenders. A castle nut is used on bolts that have a hole to accommodate a cotter pin. The pin is inserted into the bolt and rests between the slots of the nut, which keeps the nut from spinning off the bolt. I’m guessing you can figure out why it’s called castle nut.
In this case, I’m using the nut in a way that no one intended. Such is the way of a junk metal sculptor.
The space between the castle nut teeth needed to be widened to accommodate the swivel bar of the cufflink. I also made a notch for the swivel bar to twist into and ‘lock’ in place. This was done with hand files. The trick was to file the notch to just the right depth – too much filing means the cufflink would rattle around and even fall out, and not enough filing could over-stress the gold and damage the cufflink. Going slowly and checking often yielded success.
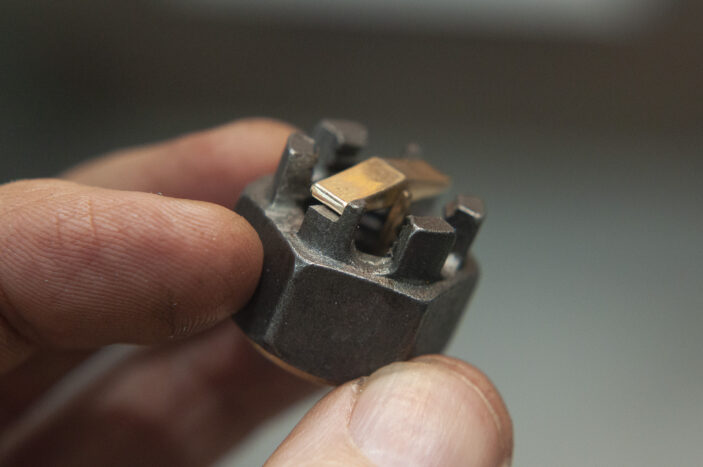
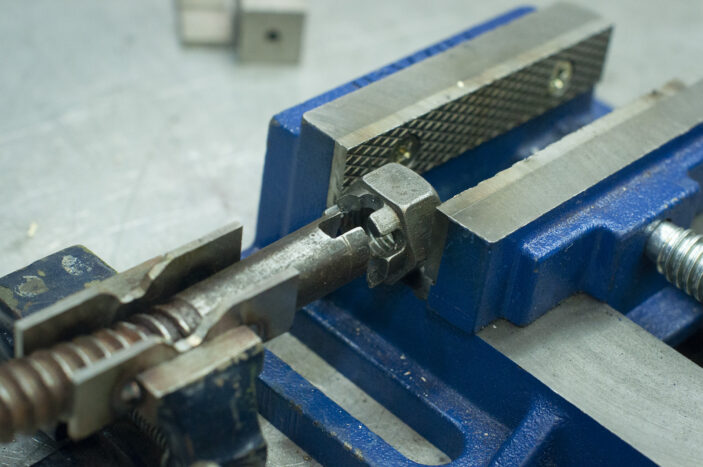
In this image you can see the cufflink interfacing with the castle nut. To remove the cufflink, simply rotate, and move the swivel bar to the vertical position using the widened channel, and pull out.
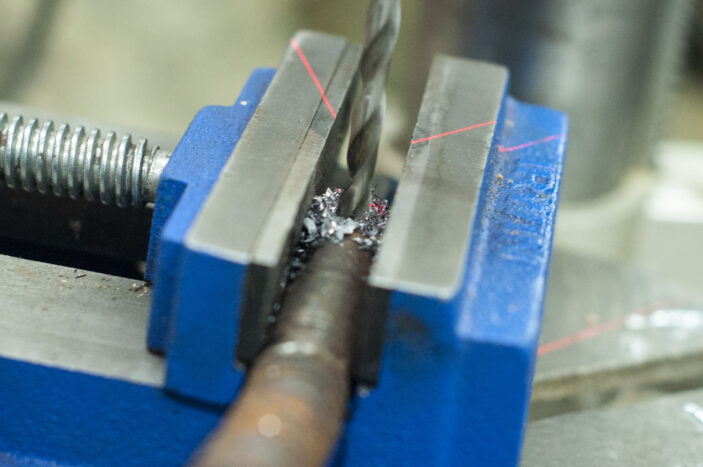
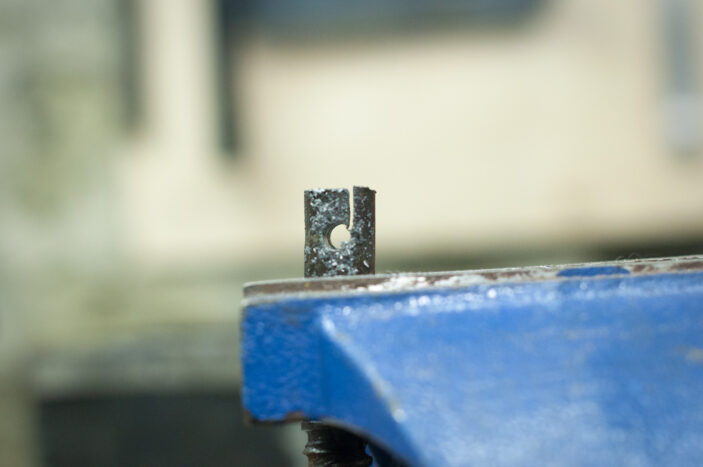
In order for the cufflink’s swivel arm to have clearance for removal, a channel needed to be added to the upper arm where the castle nut attaches. I needed to make a U-shaped slot for the swivel bar to clear. To create the slot, I stared by drilling a hole in the arm, which was made from a lag bolt with the head hack-sawed off. By the way, the heads of the lag bolts became part of Abbot J in another spot. See if you can find them.
Yes, this robot was constructed with the help of lasers! They let me know where the drill will touch down.
Here’s a helpful tip (no pun intended): I learned a number of years back that drills don’t have the ability to cut at the center. Anyone who has tried to drill a hole on a tube or a bar can testify that the bit will ‘walk’ and spin off center. To work around this, use a center punch – or even better – a starter bit, which is specifically designed to cut in the center. I use what’s called a ‘combination drill bit’, which is a starter bit combined with drill bit. I then follow-up with the correct sized drill bit. Always use a little cutting fluid, or your bits and your work will harden.
Once the hole was drilled I used a hack-saw to cut the top slot. Afterwards I cleaned up the shape with hand files. I love using hand-files!
One of my favorite phrases is “to build is to know”. Once the nut and the bolt were machined it became apparent that in order for the cufflink to have proper clearance, a gap was needed between the two parts. I used the weld wire literally as filler – not something I make a habit of, but this time it was the correct application.
I’m happy to say that the first attempt worked, so it was easy to do it right the second time.
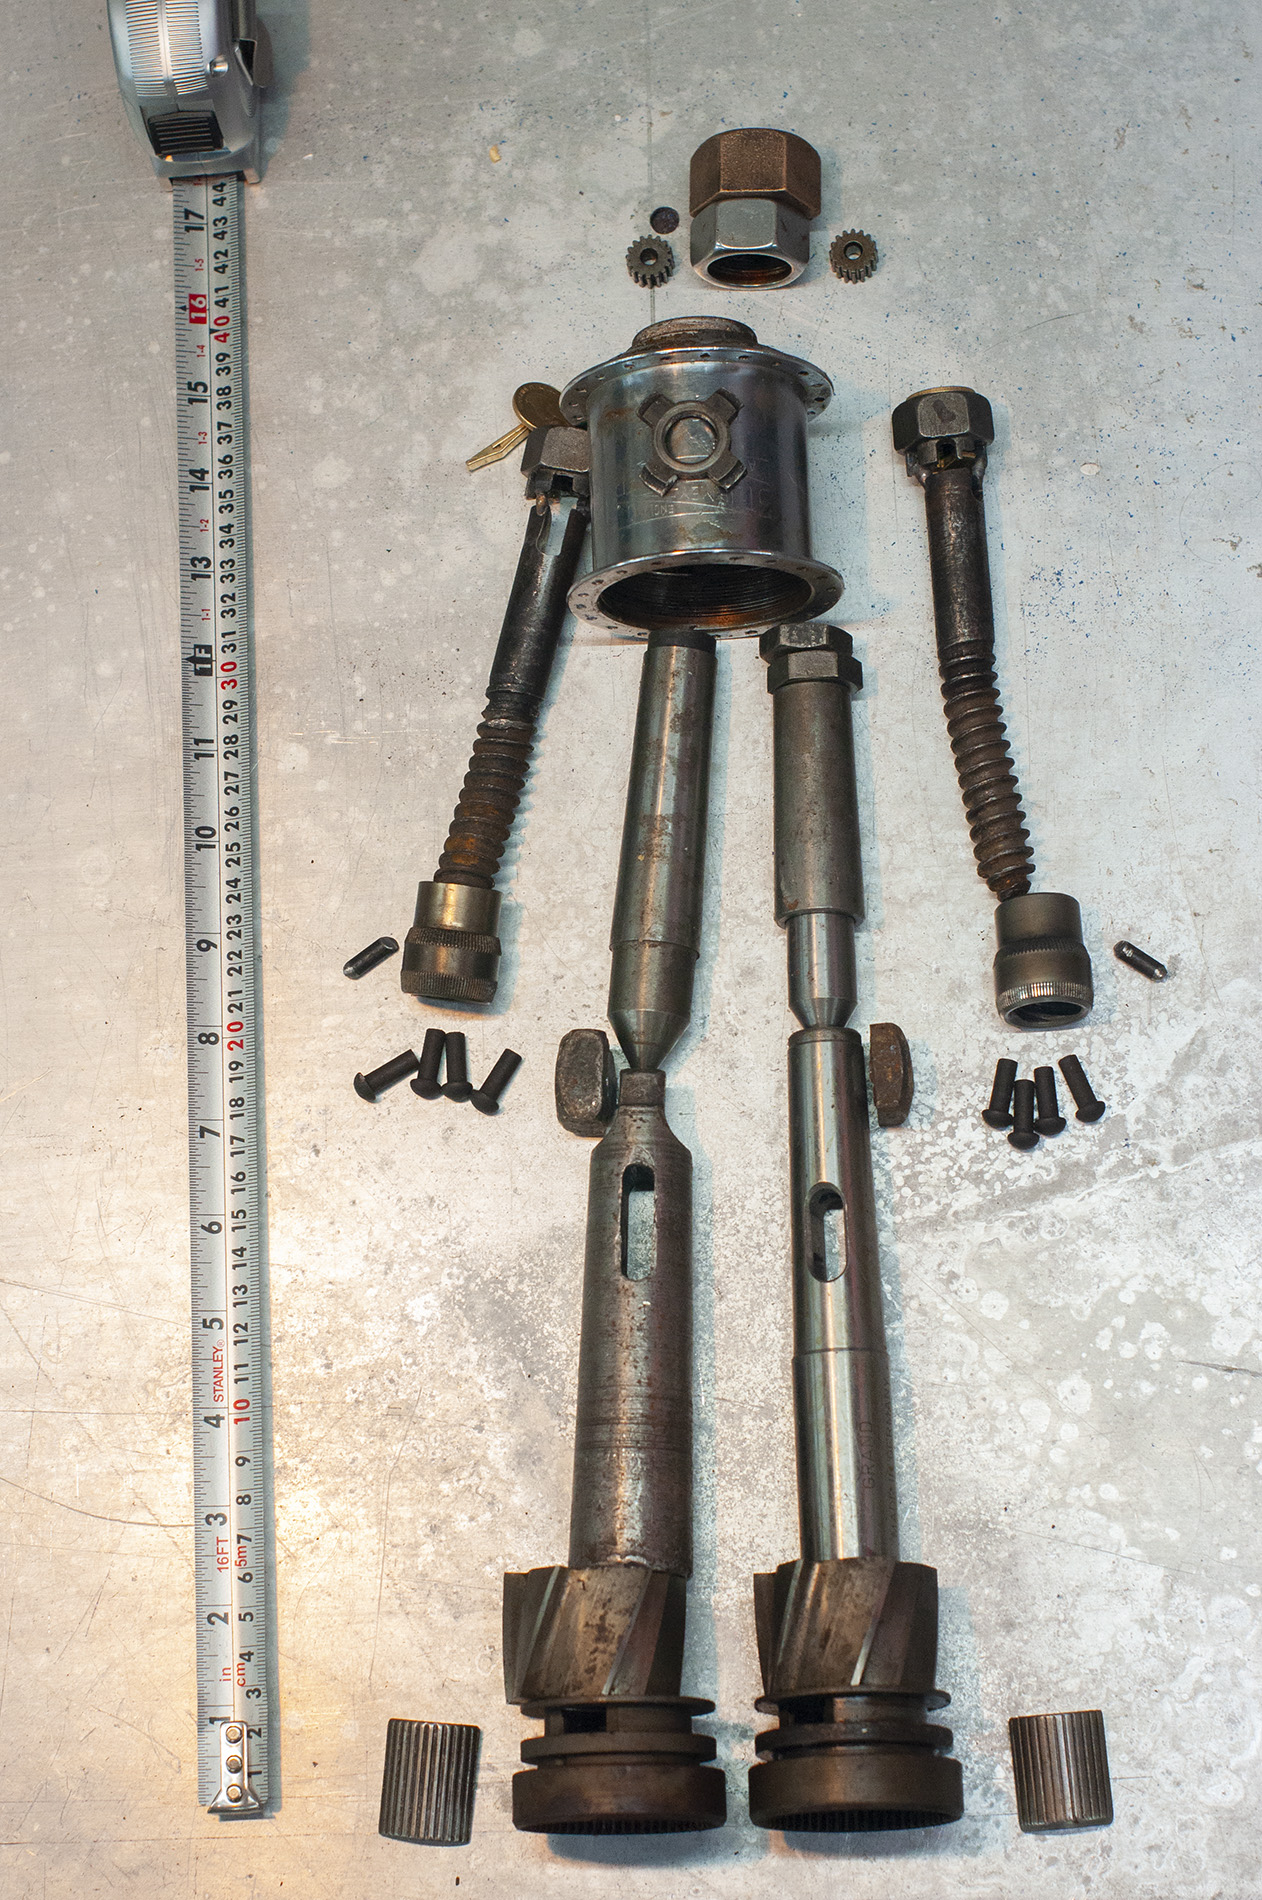
Here’s a ‘baby picture’ of Abbot J – this is how I ‘sketch’ out my work. While I have a strong background in 2D work, it typically isn’t very useful when picking parts for a robot. It’s more effective to lay them out on a table, swapping parts out until the proportions are just right. I wanted Abbot J to give the impression of a big tall mountaineer with a rugged jaw. I’ll leave it to you as to whether or not he’s got the right stuff.
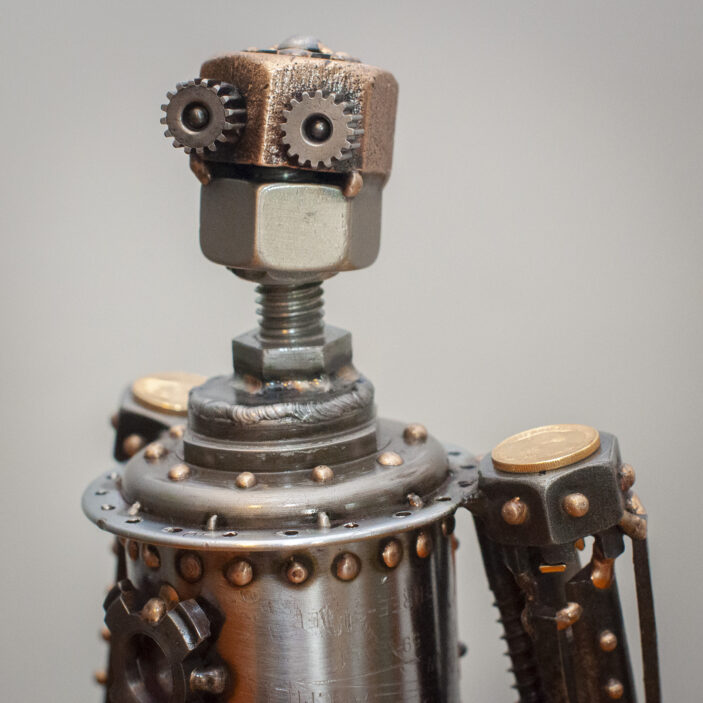
Fast forward to the end: Here’s the official portrait of Abbot J. completed. In order to help the robot look complete, I added several flooring nails and a couple of nice screws to the arms, to help give the impression of implied mechanics. This helps make the slot look purposeful as a robot feature, and not just a means to allow removal of the cufflinks.
As you can see, Abbot J is very happy. I feel that the integration was a success. Note the rare bronze nut that was used for Abbot’s cranium – I think this is a nice way to offset the gold.
More on Abbot J
To see a full parts list, dimensions and weight, please visit Abbot J’s official page.

