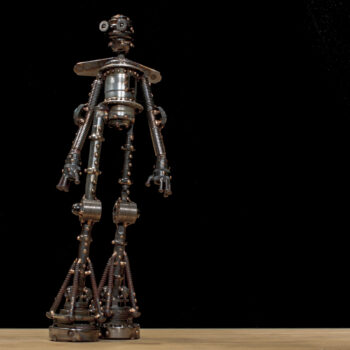
Houston M424
Houston is a Mercury-class Astrobot commissioned by a client to celebrate their profound love for space exploration – which in turn was a similarly exciting endeavor for the sculptor: As I attempted to itemize a rudimentary list of junk metal parts resembling a robot wearing a spacesuit, I began to realize this was going to be no ordinary endeavor. Like space exploration, this ‘expedition’ of art piece required a great deal of thought, creative solutions, time, and effort to meet unanticipated challenges. Fortunately the client clicked the ‘I never rush art’ delivery date request. If you – the reader – aren’t in a rush either, I would like to share the story of Houston with you.
What Makes an Astrobot an Astronaut?
While I’ve never thought of my robots as ‘not having clothes’, I didn’t think of them having clothes either. The idea of adding an additional layer without having the robot appear bulkier turned out to be one of those simple solutions to a problem that requires a greater share of soul searching – as well as steel parts searching – than even the most experienced and nuanced mind of a master junk metal sculptor could have anticipated. I found the answer in one of my metal ammo cans:
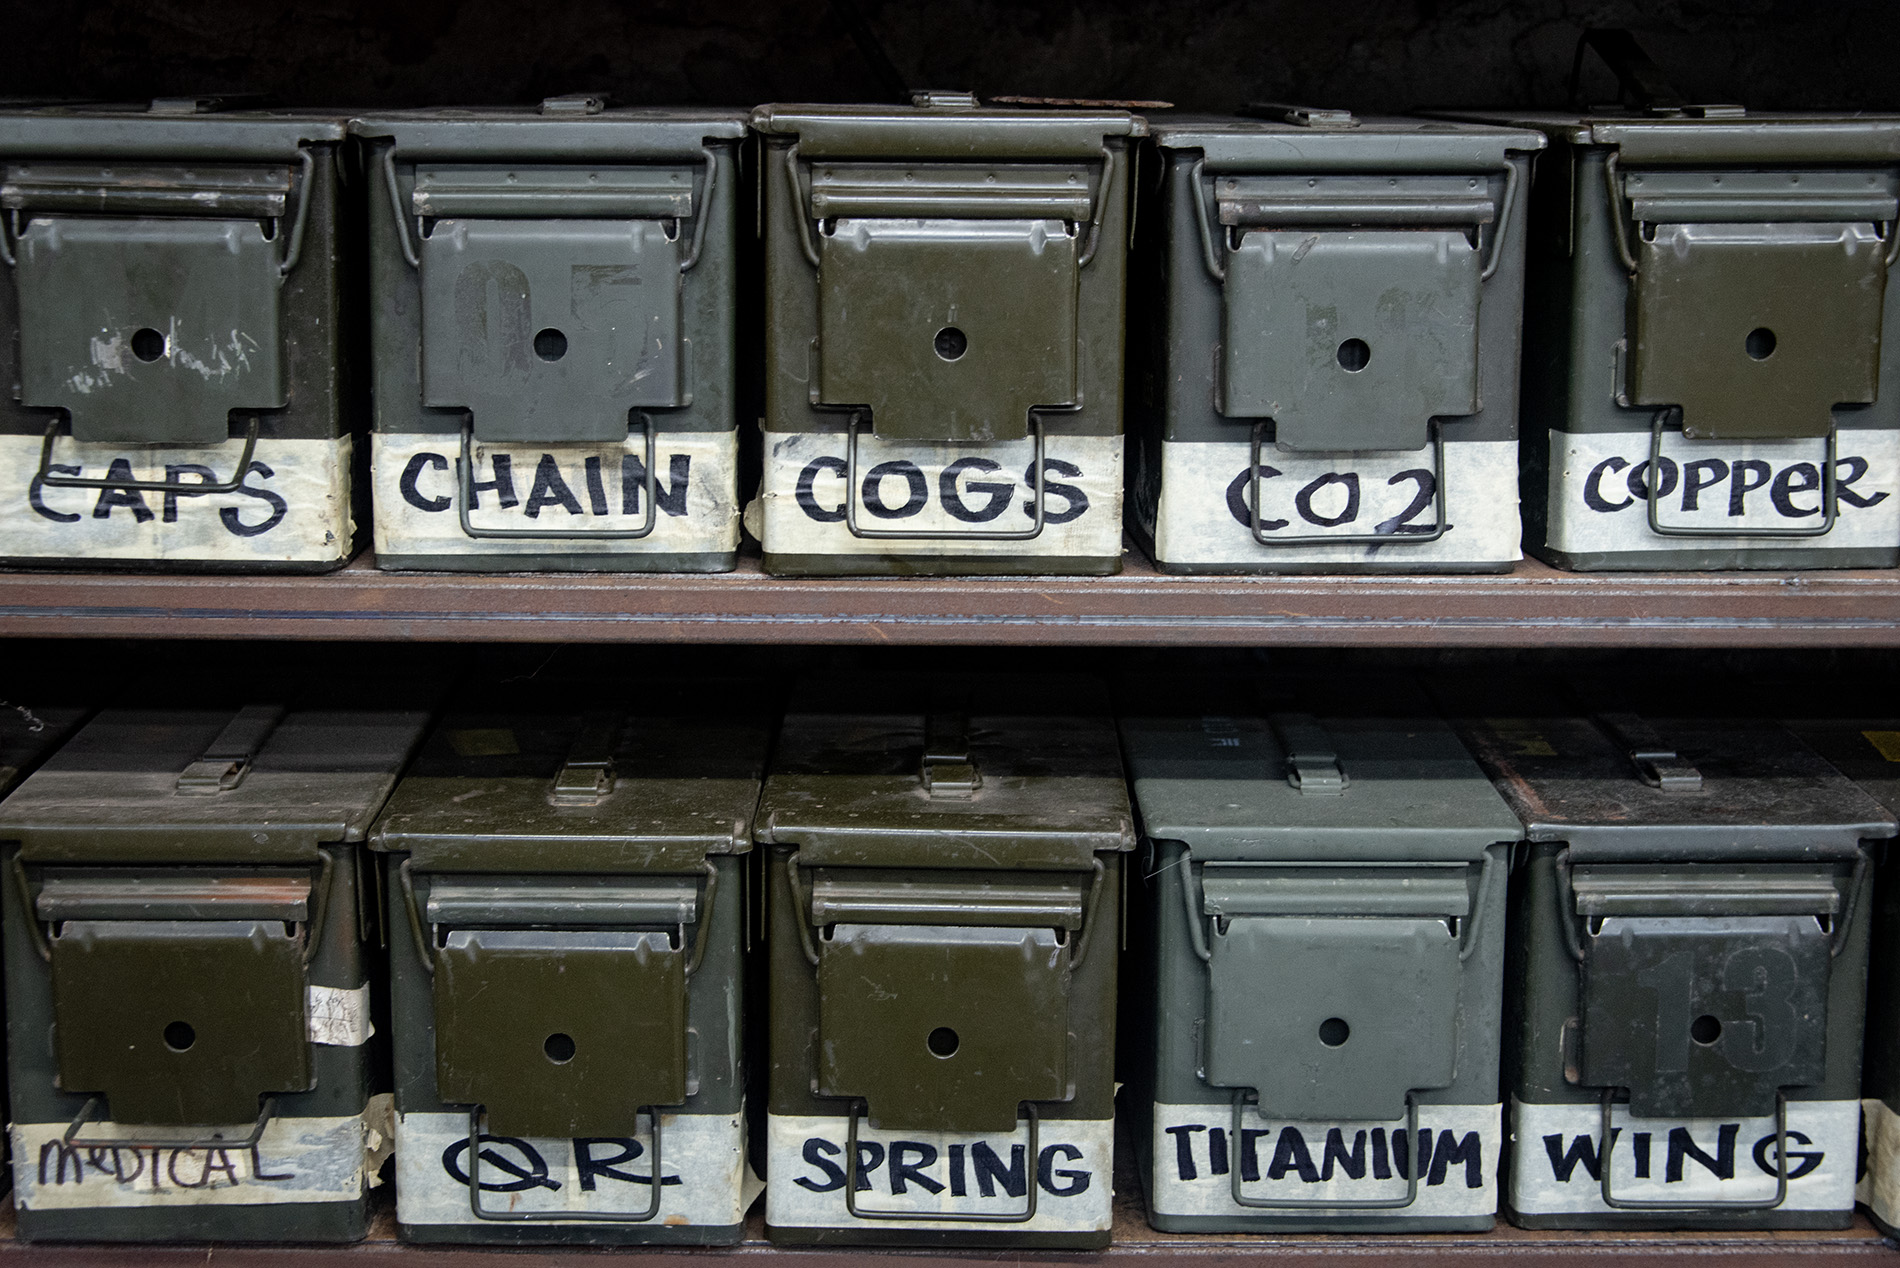
A noble use for surplus military ammo cans – metal boxes for metal parts.
I tend not to use springs in my work – not because they aren’t a good aesthetic component to use, but because spring steel loses a good deal of it’s strength when heated with a welding torch. My solution to this was to rely on the rods placed inside the springs for the strength needed to hold this heavy bot together. This worked out well since I was looking to have the spring be the outer protective layer to the arms and legs underneath.
Rethinking the robot joints for space travel
When crafting a robot from a limited collection of steel bits and bobs, limited choices can lead to a more impressionistic approach for the interfaces of critical joints such as hips and shoulders. A robot can have more loosely defined gaps, which give them their playful robotic feel. This tried-and-true technique wasn’t holding up with this piece: A spacesuit is vacuum tight – which lead me to reimagining new ways to connect arms and legs to the torso. I needed to rethink my methods and push towards a more seamless interface between all parts so the suit looked space-worthy. Fortunately for me, a long-distance fan from St. Cloud, Minnesota has been sending me heavy packages filled with lots of amazing steel pieces: amongst the parts were a set of baoding balls – which happened to fit perfectly into the opening of the vintage bicycle hub used for the torso. As an added bonus, this means that when you shake the robot it chimes.
The robot torso
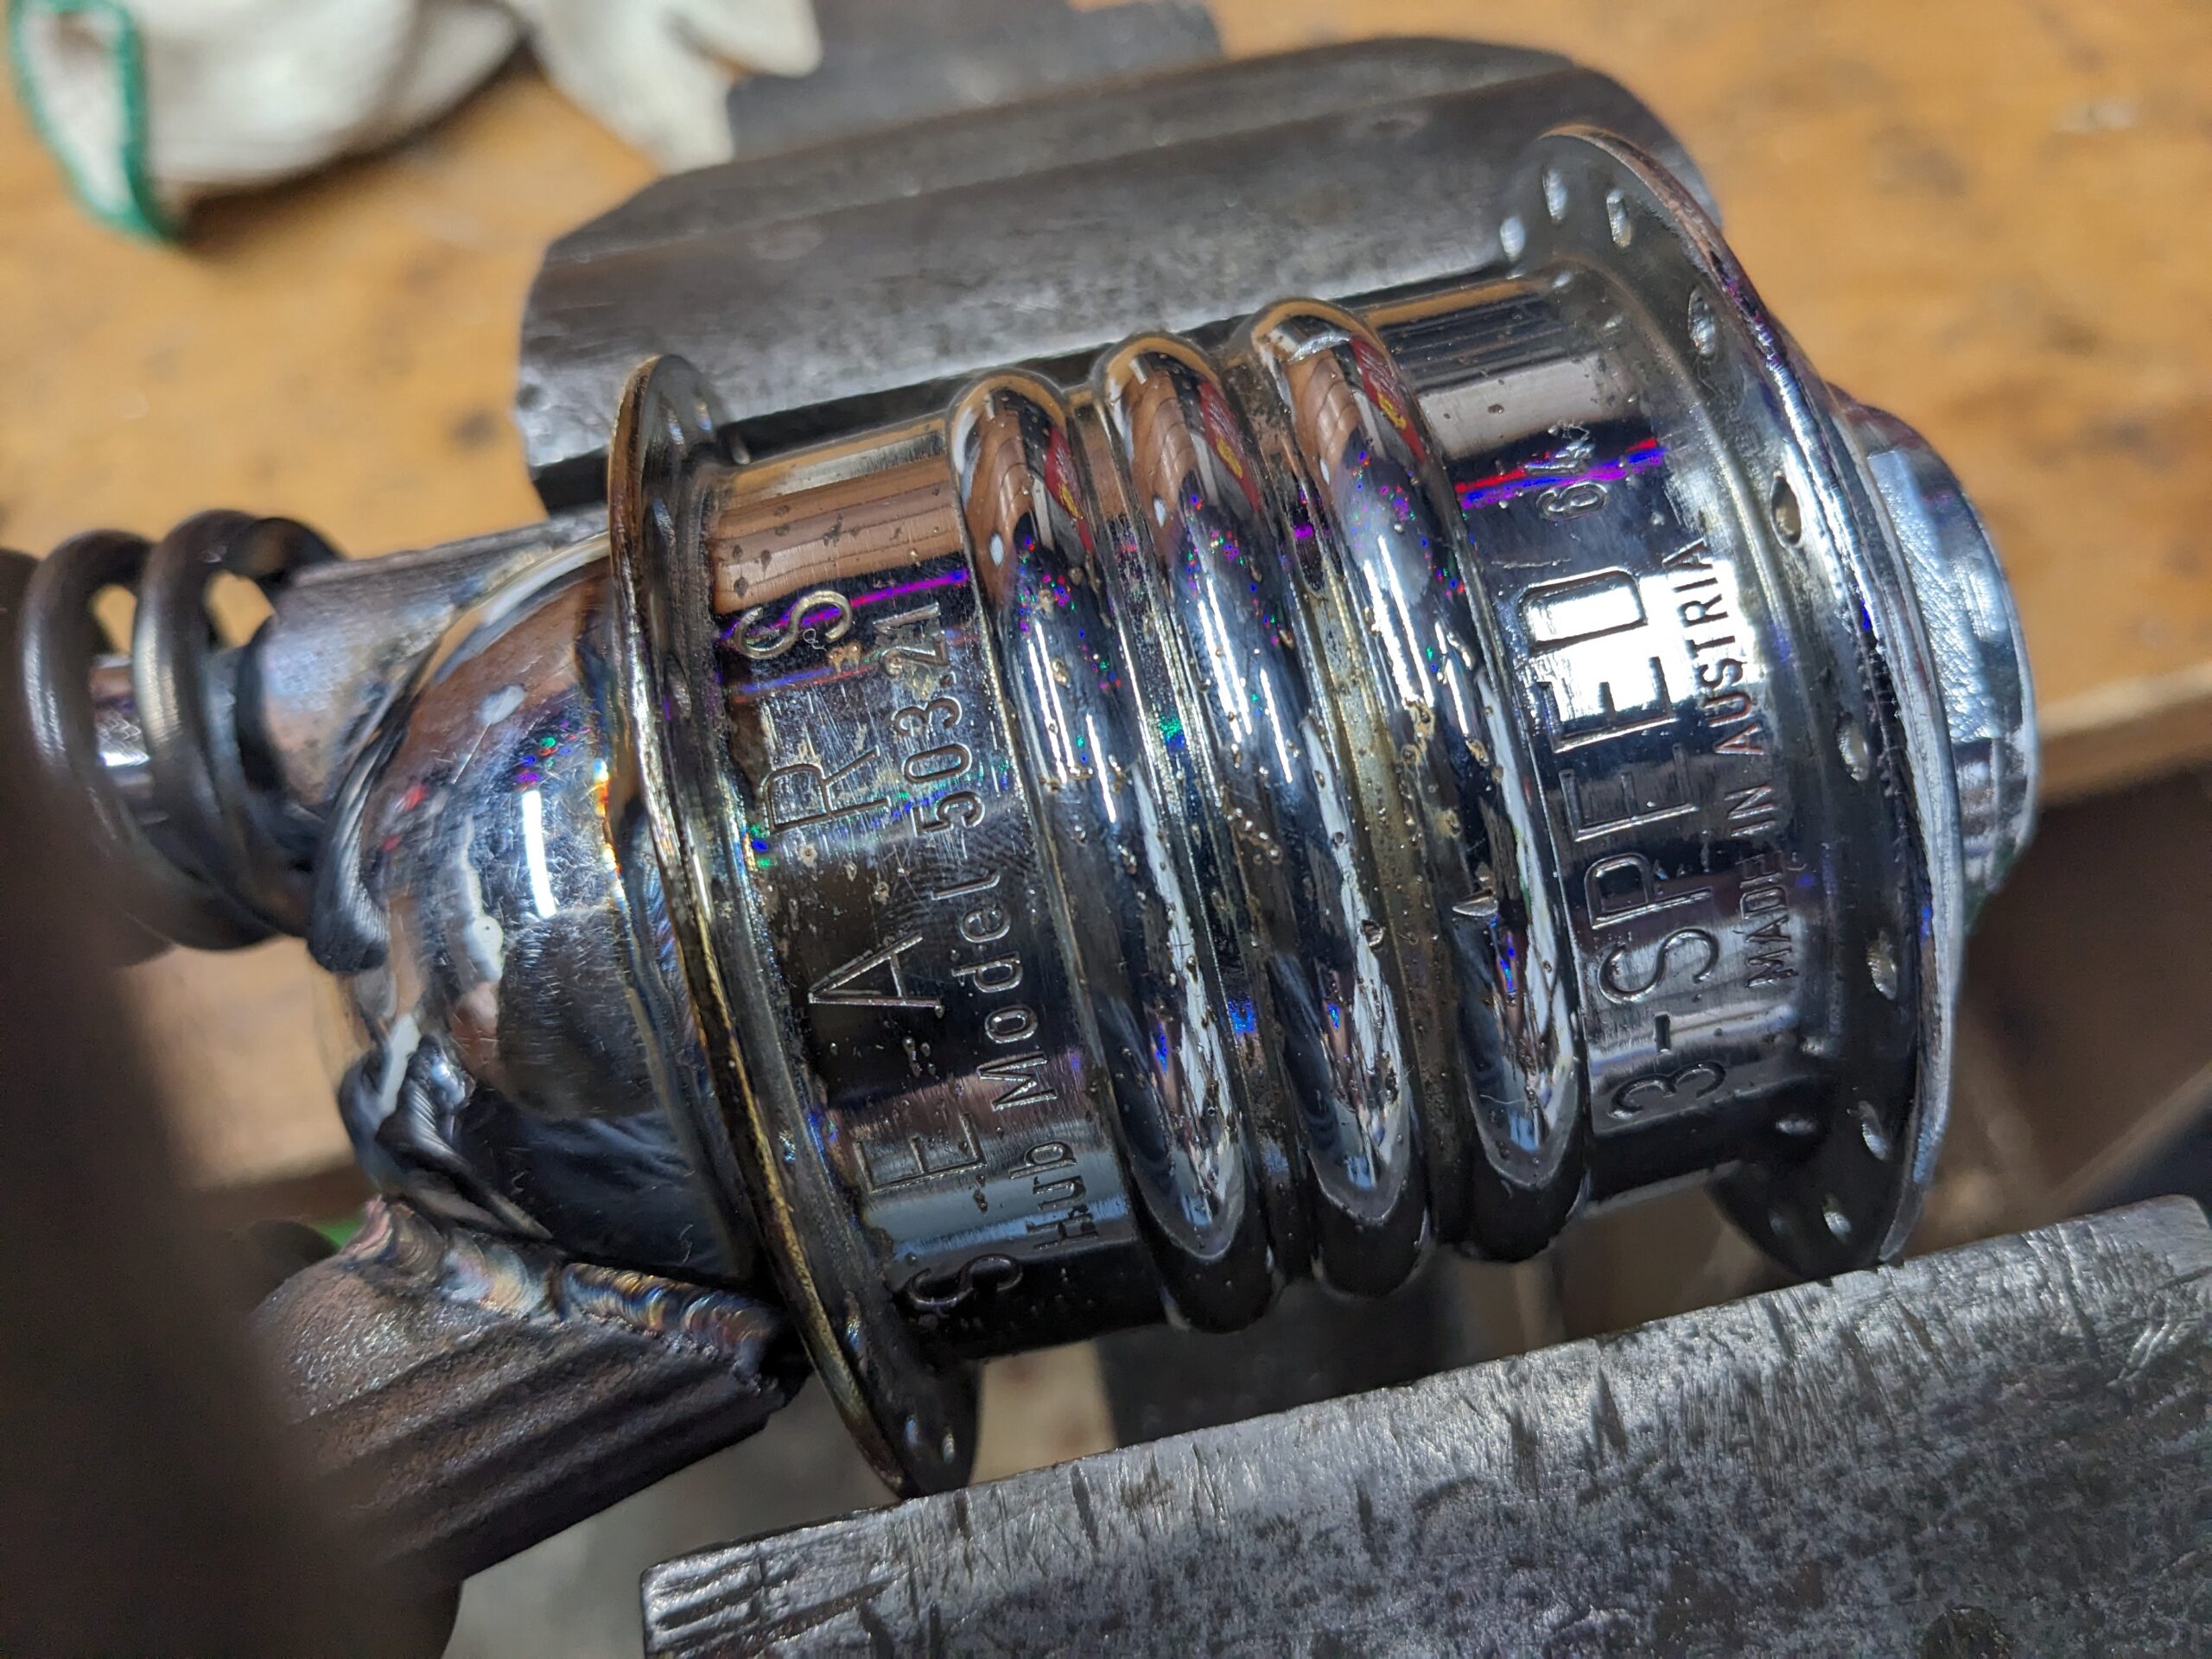
I used a very special bike hub for the torso: a Sears three-speed bicycle hub made in Austria in 1964 – complete with a port once used to for internal gear lubrication – something to add to the spacesuit vibe. It was the only ‘torso’ in my collection that looked right. It polished up very nicely except where the chrome has flaked off. These imperfections are what I love about old steel parts – they give the spaceman some ‘mileage’ – looks like he’s had many adventures already!
Dropping the Shield and Striking the Arc
It was fun having lots of a-ha moments to formulate an overall plan, but after a while I needed to strike that welding arc and go from the planning stage and into the preparing stage, to the actual making part. The transition was not as cut and dry: I was constantly rethinking solutions to problems that I didn’t feel were resolved, swapping some parts for others, and sometimes omitting things I once thought important to the piece. It was slow going, but good things take time and careful consideration, along with a fair share of refinement and rework now and then.
The Space Helmet

The helmet took some time and patience. Getting the robot’s eyes as close to the head was very important in order the stainless tubing scrap end to fit on his head. This is the second piece of mine to have reimagined smaller eyes, which gives my newest robots a more human look. This makes it possible for me to be able to sleeve the stainless tube over the head after a bit of grinding the nut to become the cranium.
I designed and built the helmet to use a disc shaped rare-earth magnet so it can firmly connect with the astronaut’s head, firmly enough so that if you twist the helmet, the head twists with it. Having a magnet on the inside of the helmet also means the astronaut can hold it in either hand. While I’m reluctant to have my art be able to separate into pieces, I felt this one needed to be one of those rare exceptions.
I carefully cut the visor hole using a drill press, hacksaw, and dremel tool, then cleaned the edges with a file and sandpaper. Welding the helmet pieces together gave the helmet a nice bit of color in the heat-affected zone – I used the same torch technique to soften the visor edge. I realized when the piece was completed that the helmet could be worn backwards to make the astronaut look like an alien.
The Space Pack
The backpack consists of three very solid blocks of tool steel of enough mass to have a significant shift in the center of gravity – so the Astronaut must lean forward to compensate. I calibrate my welding bench each time a make a robot, so all my pieces start of on level ground, and therefore are as stable as can be. All major parts must be connected before the balancing act takes place, and a solid steel pack causes a significant shift in center mass. I usually the feet get connected near the end of the construction process regardless, but I was concerned this astronaut would lose it’s impression of near-weightlessness.
A heavy robot that’s light on it’s (low gravity) feet
Sculptures made from solid steel tend to be very heavy – an aspect that works well to give the figure a sense of real weight. Normally this works in my favor, but I wanted this piece to seem almost ready to float. I welded hidden ‘heels’ in the centers of his feet at a severe angle, then cut pieces of scrap 4130 tubing I had laying around from my latest bicycle tallbike project to cover the feet. I was very pleased with how the toe boxes covered gaps and gave a seamless look. I decided to continue the motif to fill in the small gaps between the springs used for the arms and legs. This method of cutting specific fill shapes out of tubing is a evolutionary breakthrough and will most likely be used in some future pieces.
The final touches – finihshing
I’ve been finishing metal since the year 1998. This astronaut was finished with multiple techniques using a polishing wheel, abrasive pads, emery, and even some semi-purposeful blemishing during construction to help add to the backstory, such as the dent on the top of the helmet made by my beloved antique vise.
Apollo, we have a problem…
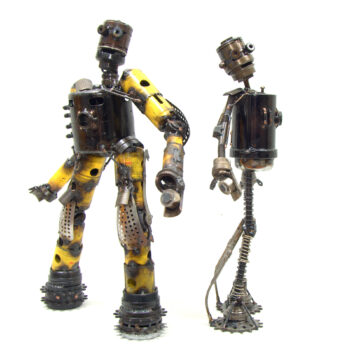
As the piece slowly progressed towards completion a couple of names came to mind, but the one that felt right was Apollo – certainly a fitting name for an Astrobot astronaut. I stamped the boilerplate and delicately welded the thin-gauge copper sheet to the solid block of tool steel – not an easy feat for even the most experienced TIG welder. This trick acts a bit like my signature, but it doesn’t always go smoothly as the copper absorbs heat quickly and can blow a hole very easily. The three copper boilerplates for this piece affixed without incident – however, when I opened my baby name book to log the serial number, I discovered that I haven’t completely memorized all four-hundred plus names I’ve chosen. Apollo M323 was made back in 2017 – almost exactly 100 Skunkadelic robots ago, almost exactly six years apart from this new piece. A neat coincidence, but I felt this new one needs his own name. I knocked off the old boilerplate with a hammer and steel punch, and renamed the boy Houston.
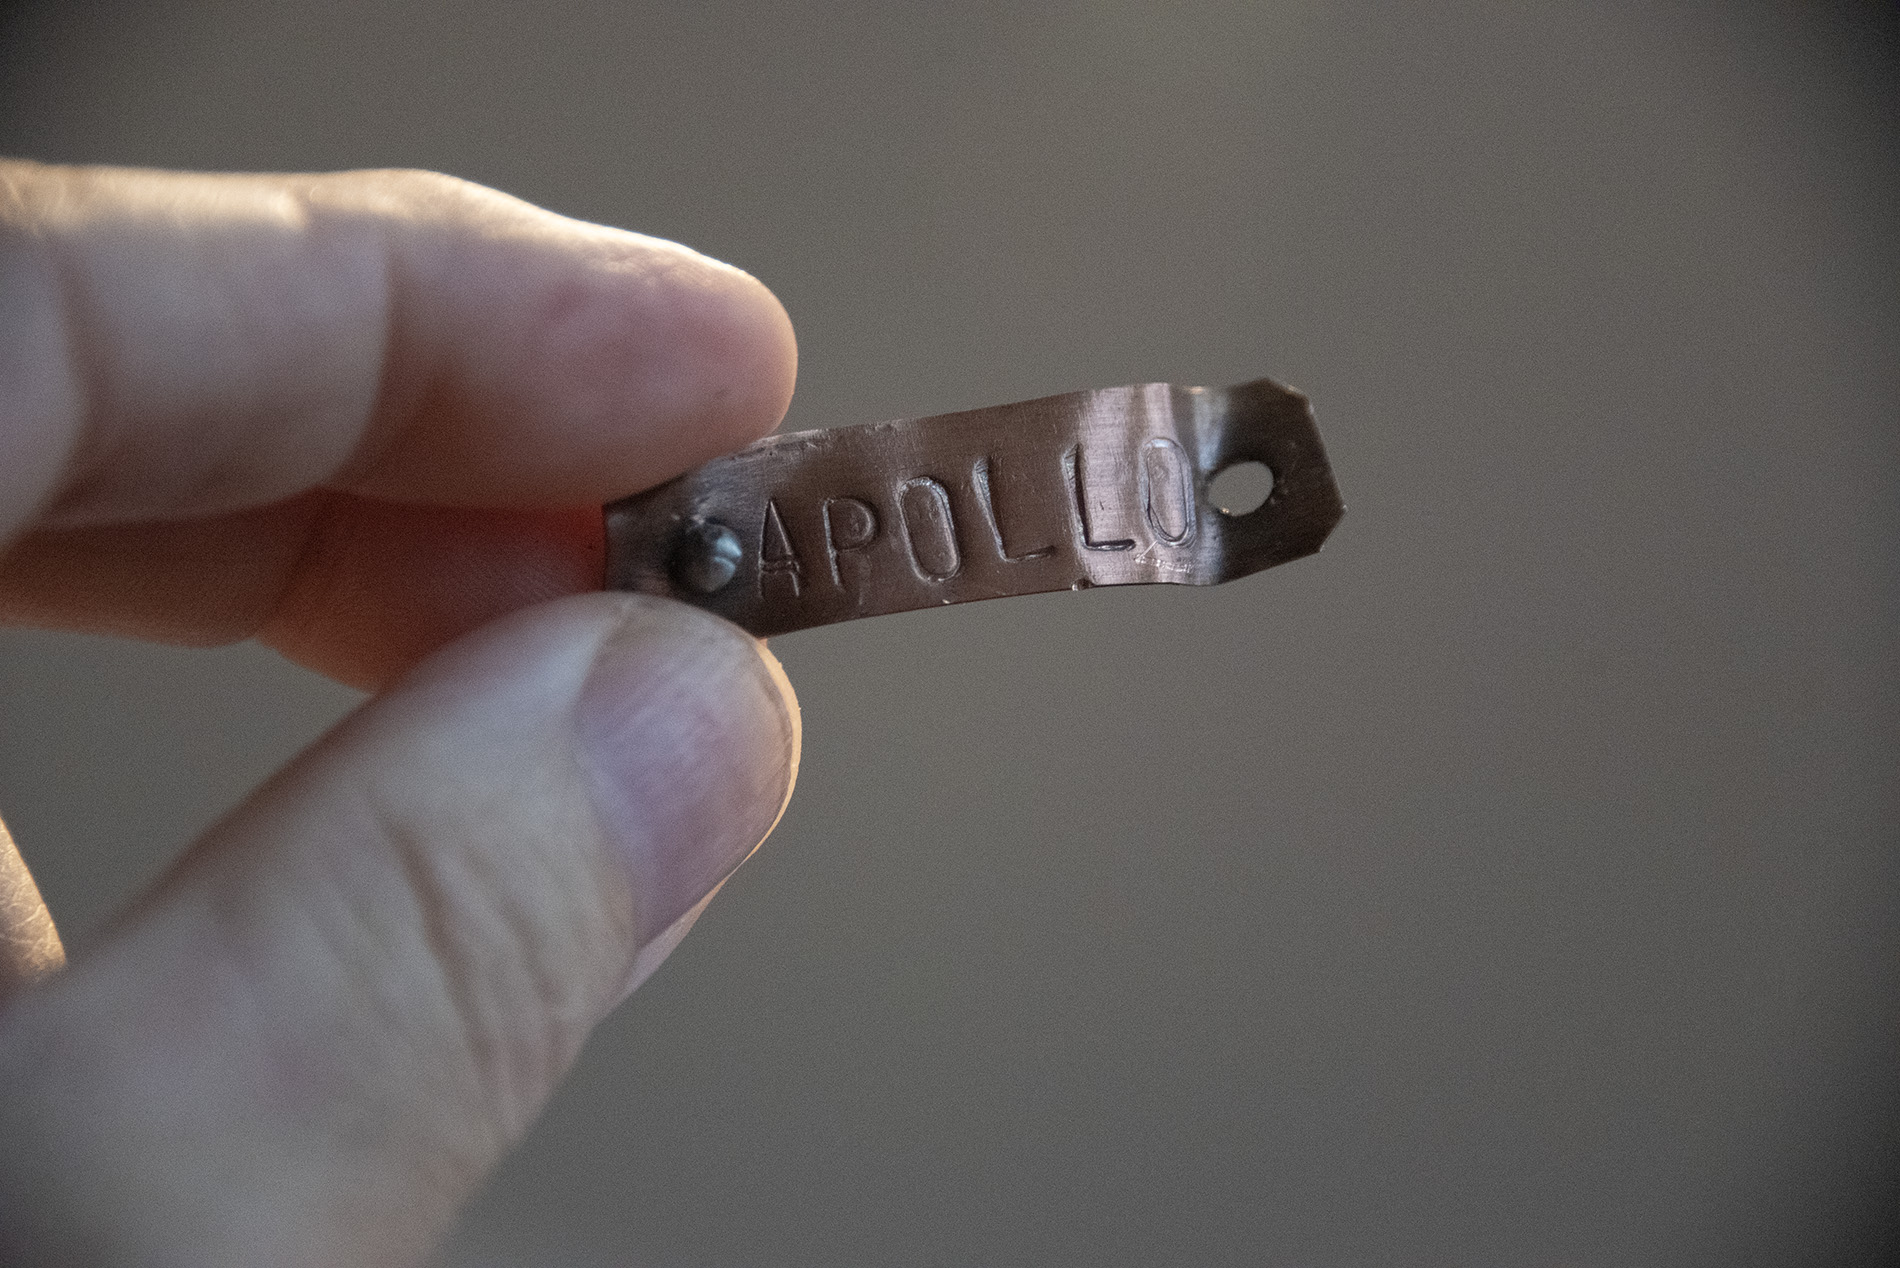
The original name tag of Astrobot M424 after being knocked off the pack with a chisel and metalworking hammer
In the bicycle chopper gang I founded back in 1996, I chose the name Skunk, but I came very close to choosing the name ‘Houston’ for myself, as we’re sci-fi themed and I thought it would be a fitting name for the founder and leader. In retrospect, that name may have been a wiser choice than ‘Skunk’. This piece is very personal for me – as one who spends a great deal of time pretending I’m having space adventures with my friends. I find the connection poetic.
My mantra for this piece was “If it’s not perfect, it’s not good enough”. This makes for great art, and for some euphoric times, but also requires a lot of rethinking, a lot of time, and sometimes rework. In the end, I hope to have ‘gone where no one has gone before’, by making something unique in the universe.
This piece has sold
If you're interested in something inspired by this piece, please let me know. Other works are available.